Recovery via Emergency Download
:::info This tutorial was made base on my personal experience with recovering Technisat MIB2 in vehicle, without bench setup.
I'm not sure if the procedure is the same for PQ units, for MIB2 Standard by Delphi, for MIB2High by Harman, and other MIB units.
:::
Required
- Quality SD card,
4GBor larger (how to check SD card), - The firmware that is shown on the label of the cover of the unit (you should respect the region EU/US etc. and use any corresponding version. For example if firmware is
0456, you can use any04xx. If0356then any03xxand so on), - USB-UART signal converter,
- PC/laptop with PuTTY,
- Main unit removal keys,
- Torx driver,
- Tweezers.
Procedure
Prepare SD card
- Format with
FAT32, set smallest available cluster size. - Extract original firmware to the root of the SD card.
Prepare main unit
- Use removal key to unlock the unit and slide it out.
- Disconnect QuadLock connector.
- Remove top lid from the unit (4 visible screws, 1 hidden under the sticker).
- Lift up the CD drive for main board access.
Prepare and test serial communication
:::info Check Quadlock - pin layout for details
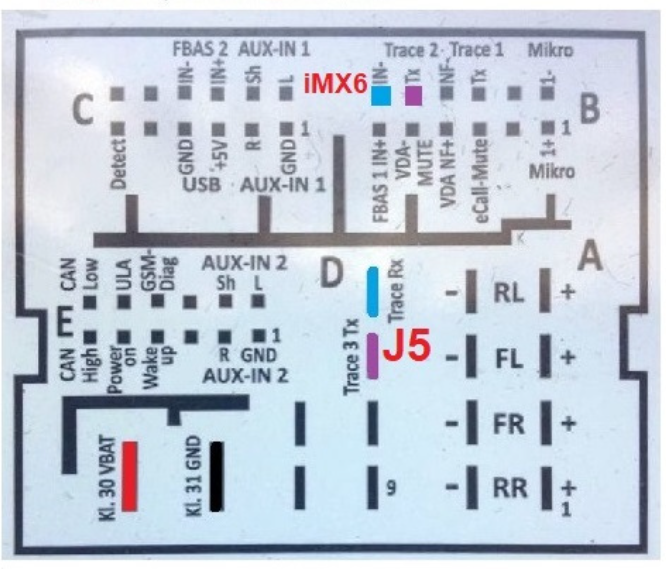
:::
- Set signal converter to
3.3Vlogic level. - Remove purple lock from QuadLock.
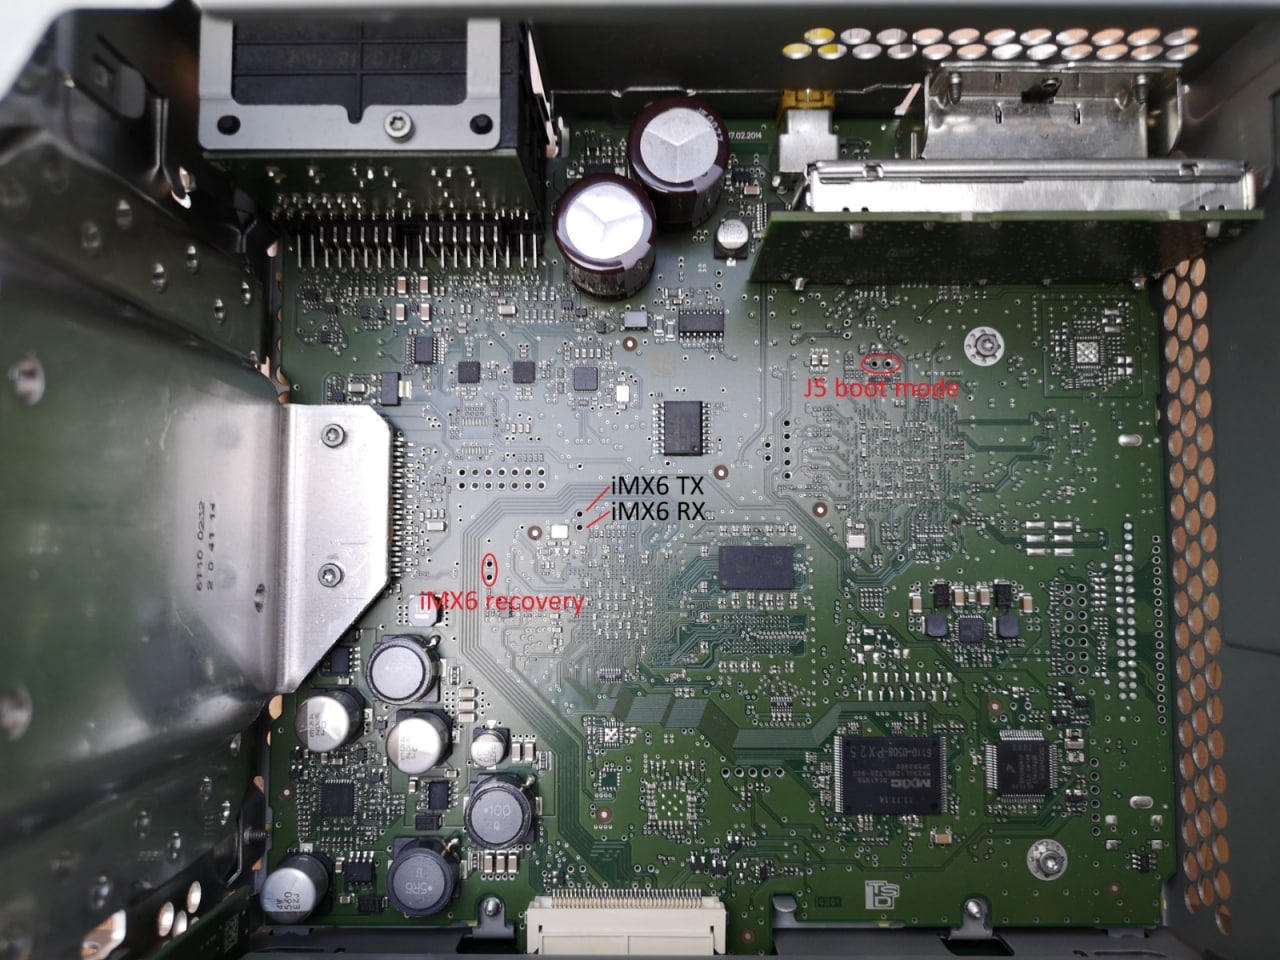
- Insert two terminals for
TxandRxconnection on the "J5" TTL terminals. - Insert purple lock back to lock new pins.
- Connect
Txfrom MIB toRxin converter. - Connect
Rxfrom MIB toTxin converter. - Connect
Gndfrom MIB toGndin converter. - Connect converter to PC, open Device Manager, check what's the COM port number.
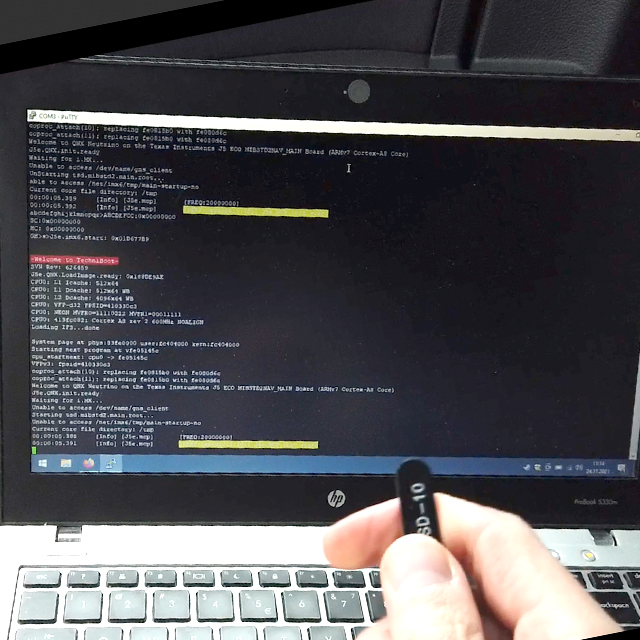
- Start PuTTY, set connection type to Serial, input port name, set baudrate to
115200bps, start connection. - Connect QuadLock to confirm that the serial communication is working and you can see logs from MIB on your PC while the main unit is in boot loop.
:::tip You can use crocodile clip for Gnd connection on the MIB housing. It's easier and faster than to use GND from the QuadLock.
:::
 |
 |
 |
 |
|---|---|---|---|
2
Enter recovery Menu
:::info TODO: photo of the main board jumper
:::
:::warning Use external power supply of 3A minimum or turn on the engine to prevent voltage drops and power issues while the procedure is in progress.
:::
- Turn the ignition on. If you have Kessy (keyless ignition) make sure that the key stays in the vehicle at all times (here's why: Kessy & Updates).
- Disconnect QuadLock.
- Insert prepared SD card to
SD1port. - Make sure that the serial connection on your PC is still active.
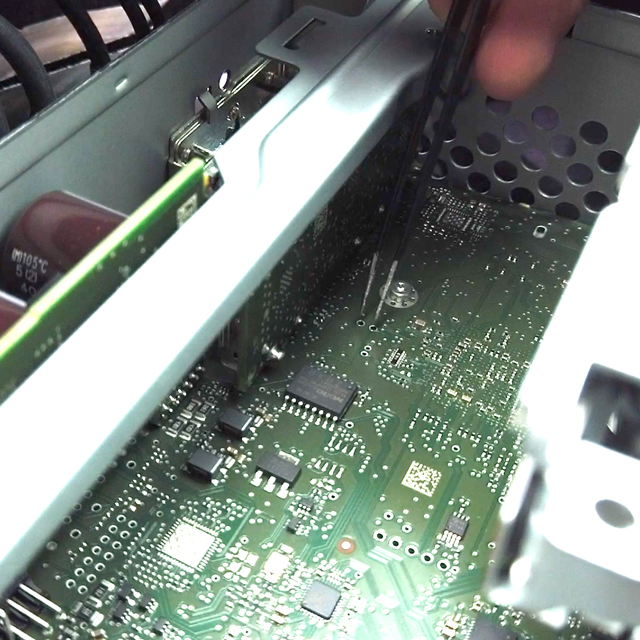
- Use tweezers to short two point on the main board.
- Connect QuadLock while the tweezers are still shorting the main board.
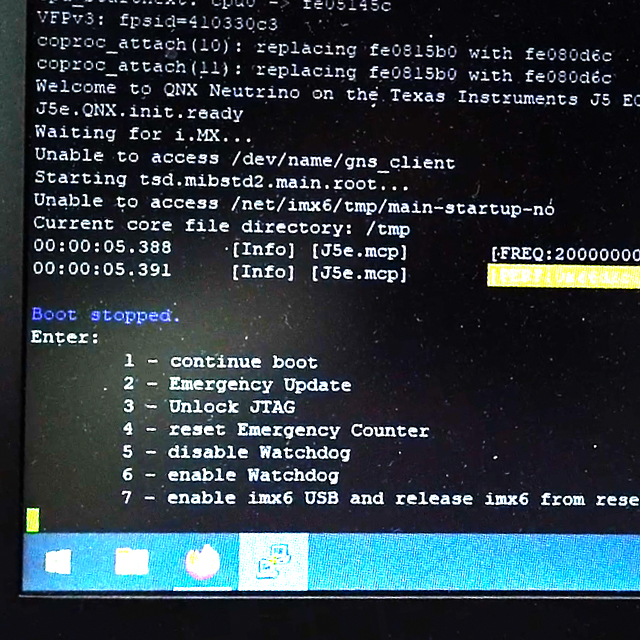
- In Putty you should see a recovery menu with 7 options.
Restore system
- While in recovery menu press
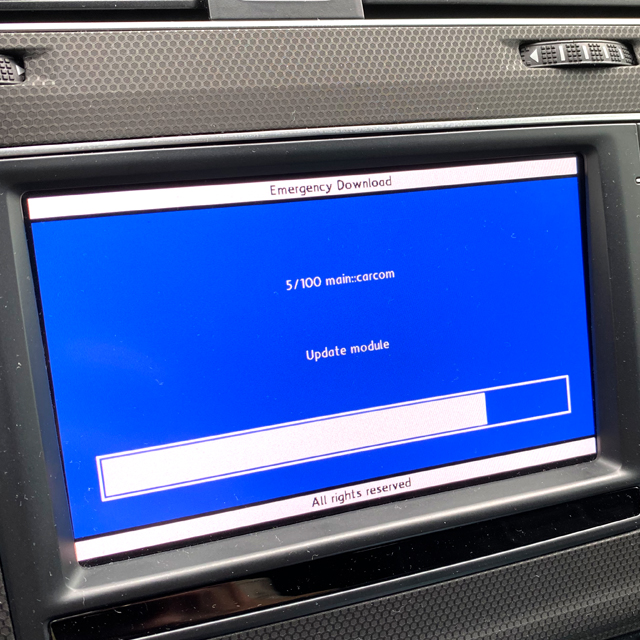
2then in Putty to selectEmergency Download. - MIB should start in
Emergency Downloadmode and should immediately start system recovery. This will take around 30 minutes. It will perform download of around 100 firmware parts. - MIB will reboot before installing last 2 parts.
- After the reboot you should see normal update screen and last 2 parts will be installed (
cpu::emergencyandmain::emergency) and MIB will reboot. - Now you should boot into working system.
- After the reboot you will see update raport, which you can can exit with the arrow in upper-right corner, next press
Cancel. Unit will reboot. - Now start a normal update as some modules may still need updates.
\
 |
 |
 |
 |
|---|---|---|---|
After the recovery
Emergency download will overwrite custom changes in your system, like CP patch, SWDL patch, SWaP patch, CID-lock patch, Toolbox, skins and sounds. You will have to apply patches again.